About Me

- Patty
- Hi! My name is Patty aka SUNSPOTPP. I am presently a SAHM to my 4 yr. old grand daughter, Autumn, whom I adopted Dec. 12, 2008. I am 6 hrs (2 classes) away from my Associates Degree as a Drug/Alcohol Counselor, but had a set back in my health and have had to put that on hold for now. I have been PSP'ing for about 7 yrs. PSP is a GREAT stress reliever for me and I try to play as often as I can. Oh yeah, I live in Dublin, TX in the wonderful USA, home of the "Original" Dr Pepper that still uses "Imperial pure cane sugar"! If you want to know anything else, just ask! ♥ Me


Thursday, January 15, 2009
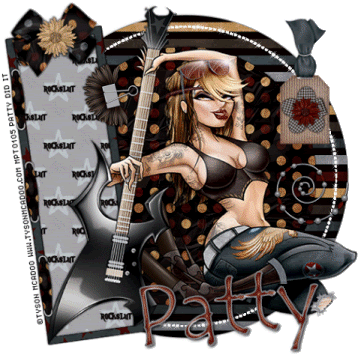
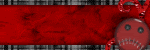
 Rock Slut
Rock Slut
Supplies Needed:
Paint Shop Pro
Animation Shop
Font of choice - I used Tempus Sans
Alien Skin Xenofex - Constellation (optional)
Scrapkit of your choice - I am usung "Rock Slut" PTU kit by Fi's Fault Scraps available for purchase at Digital Chaos.
Tube of choice - I am using the awesome artwork of Tyson McAdoo, which you can buy at MPT.
Template of choice - I am using template #32 by Aqua Rebel, which can be found here...don't forget to leave her some love.
Template of choice - I am using template #32 by Aqua Rebel, which can be found here...don't forget to leave her some love.
Let's begin:
Open template #32, shift D to make a copy, and delete the original template.
X out the credits layer on the copy.
Click on Raster 1, selections, select all, float, defloat.
Copy & paste paper 05.
Resize paper 60%.
Selections, invert and click delete on your keyboard.
Selections none.
Drop shadow - I used 0,0,63,3 Black.
Delete Raster 1.
Click on Copy of Raster 1, selections, select all, float, defloat.
Copy & paste paper 01.
Resize paper 50%.
Selections, invert and click delete on your keyboard.
Selections none.
Same drop shadow as above.
Delete Copy of Raster 1.
Click on Raster 2 & duplicate 2 x's, giving you 3 layers.
Click on the original/bottom Raster 2 and apply these Xenofex Constellation settings...
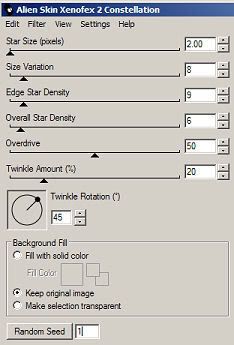
Repeat the next 2 layers, but this time hit the random button for each.
Click on Raster 3, selections, select all, float, defloat.
Copy & paste paper 06.
Resize paper 65%.
Selections, invert and click delete on your keyboard.
Selections none.
Same drop shadow as above.
Delete Raster 3.
Raster 4 - add the same drop shadow as above.
Add tube and elements to your liking, use tag as reference, adding same drop shadow as above.
Add your name & © information.
Crop & resize to your liking, if needed.
Save as either a .png or .jpeg, whichever you prefer or go on to animate!
Open Animation Shop.
Right click, copy merged, making sure the bottom constellation layer is open.
Paste as new layer in Animation Shop.
Back to PSP, close off the bottom constellation layer and open the next copy.
Copy merged.
Back to AS, right click and paste after current frame.
Back to PSP, close that layer and open the last constellation layer.
Copy Merged.
Back to AS and paste after current frame.
Check your animation then save as gif!
Thank you for trying my tut!
Hugs & kisses!
<3
Me
This tutorial was written by me on January 13, 2009 and is my own idea and creation.
Any other tutorials found to be similar is purely coincidental!
Subscribe to:
Post Comments (Atom)


0 comments:
Post a Comment